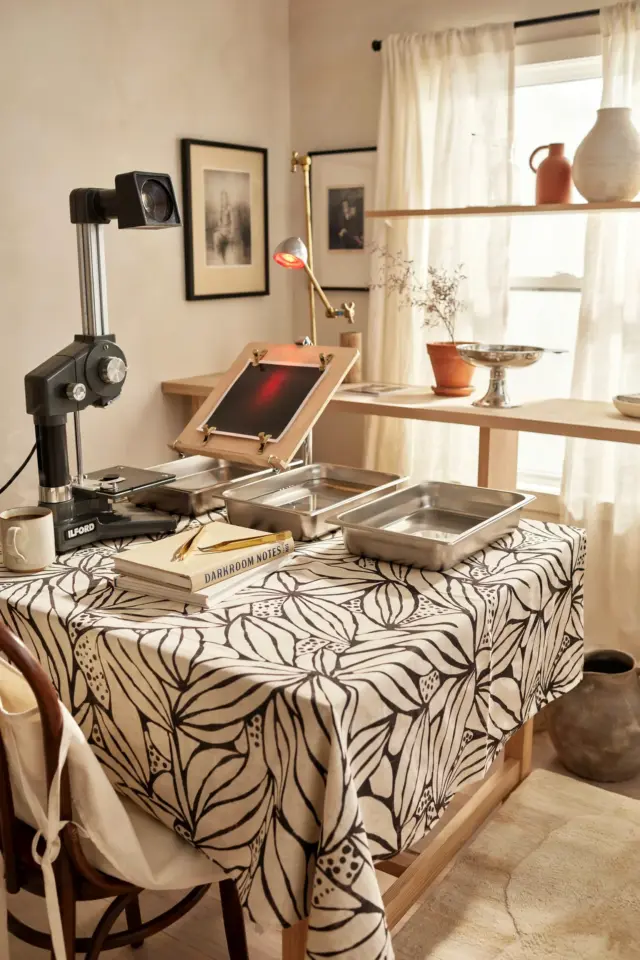
If you have been dreaming about creating your own darkroomsetup but feel limited by square footage, you are not alone. Many photographers assume they need a dedicated room with plumbing and lots of counter space. The truth is that a functional darkroom can fit into a spare corner, a small bathroom, or even a walk-in closet. With the right planning, you can process film and make prints without sacrificing your living space. This guide is designed for complete beginners who have never mixed developer or handled tongs before. I will walk you through every practical step, from ventilation to shelves, so you can start printing with confidence.
Assess Your Space and Ventilation Needs
Before you buy any equipment, look at the room you plan to use. Darkroom chemicals release fumes that can irritate your eyes and lungs over time. Even if you are working with a non toxic developer, proper air exchange is essential. A small bathroom with an exhaust fan is a strong candidate because the fan pulls air out and keeps smells from spreading. If you are using a closet, consider installing a small window fan or a ductless fume extractor. You can also place a box fan in a nearby open window and point it outward. The goal is to create a steady airflow without blowing dust onto your wet prints.
One beginner mistake is underestimating how much ventilation you need. I recommend running the fan for at least ten minutes before and after each session. If the room feels stuffy or you notice a strong chemical odor, add more airflow. Your health matters more than any print, so never skip this step.
Choose Safe Lighting for Your Darkroom
The term darkroom can be misleading because you need some light to see what you are doing. The trick is to use light that does not fog your photographic paper. For black and white printing, a red or amber safelight is standard. Most papers are not sensitive to these longer wavelengths, so you can work under a dim red glow. You can buy a ready made safelight bulb that screws into a regular lamp or install a dedicated safelight fixture. Position it at least four feet from your work area to avoid accidental exposure.
If you are printing with variable contrast paper, use an amber safelight rather than bright red. Test your safelight by placing a coin on a sheet of paper for a few minutes. If the coin imprint appears after developing, your safelight is too bright or too close. For pure film loading, work in complete darkness. Always check that all light leaks are sealed, including gaps around doors and the glow from electronics. A thick blackout curtain or thermal blanket taped over the door frame can work in a pinch.
Smart Vertical Storage for Chemicals and Supplies
Counter space is precious in a small darkroom, so store your chemicals vertically. Install a sturdy shelf above your sink or workbench to hold bottles of developer, stop bath, and fixer. Use a narrow spice rack or a wall mounted wire basket for small items like tongs, funnels, and measuring spoons. I like to label every bottle with its name and mixing date using a permanent marker and painter tape. This simple habit saves you from pouring fixer into a developer tray by mistake.
- Use clear plastic bins under the sink for extra bottles and paper.
- Keep a small tray or caddy for your most used items: thermometer, timer, and graduated cylinders.
- Hang a mesh bag on the wall to dry squeegees and clips between uses.
- Store unopened paper in a cool, dry drawer away from chemicals.
A dedicated vertical shelf also lets you keep your three processing trays stacked when not in use. This arrangement frees up the entire counter for loading paper or trimming negatives.
Setting Up a Reliable Drying Rack
Wet prints need a dust free area to dry flat. A dedicated drying rack can be as simple as two sheets of window screen stretched over a wooden frame. You can buy a collapsible print drying rack online or make one from a thrifted picture frame and fiberglass screening. The key is to allow air to circulate on both sides of the print. If you stack prints directly on a towel, they will stick together and curl.
In a small bathroom, install a retractable clothesline above the bathtub. Clip your prints with plastic clothespins and let them hang overnight. For fiber based paper, use a squeegee to remove excess water first. If you are short on wall space, a foldable drying rack that sits on the counter works well. Just make sure the room is clean and dust free. I always wipe down the drying area with a damp cloth before starting a printing session.
Optimize Your Darkroom Layout in a Bathroom or Closet
A typical bathroom layout works by placing your enlarger on the toilet lid or a sturdy stool, and using the sink for water bath trays. You can slide the enlarger onto a corner shelf when not in use. In a closet, mount a drop leaf table that folds down to give you a work surface and folds back up to reclaim floor space. Keep your chemical trays on a cart with wheels so you can roll it out when printing and tuck it away when done. This modular approach lets you turn any room into a temporary darkroom in minutes.
Here is a specific setup I use in a 4×6 foot closet: a small enlarger on a folding TV tray, three 8×10 trays stacked on a plastic shelf, and a red safelight on a command hook. I store chemicals on a wall shelf above the trays. The whole system packs into two bins that I pull out for weekend sessions. Do not underestimate the power of a
#darkroomsetup #photographystudio #darkroomideas #printmaking #homedarkroom
Leave a Comment