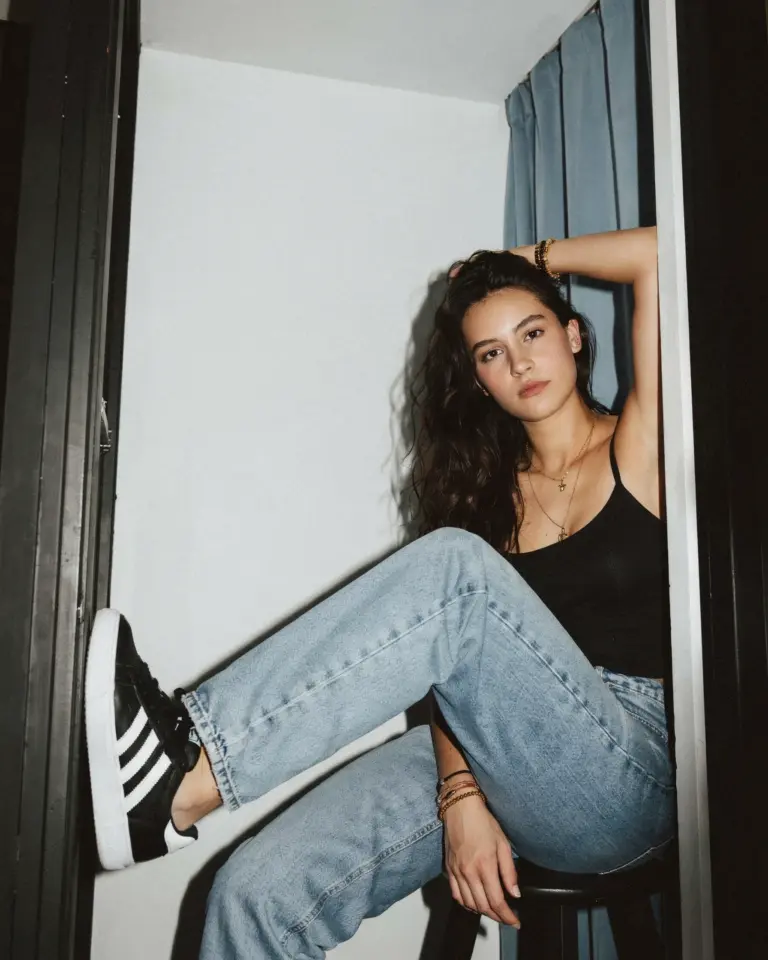
I have been on a preset buying spree lately. Not gonna lie, I downloaded like six different budget film presets for Lightroom Mobile in one week. The Y2K aesthetic was calling my name, and my fall outfit ideas needed that nostalgic grain. But here’s the thing: most people screw up the application immediately. They get the preset, slap it on, and wonder why their selfie looks like a muddy potato. So I am writing this as a common mistakes guide. Learn from my fails. Save yourself the headache and the wasted money.
Why Cheap Budget Film Presets Still Need Some Manual Tweaking
Ok so you found a pack of film presets on Etsy for three bucks. The preview photos look incredible. You import them into Lightroom Mobile and apply the first one to your fall outfit shot. It looks terrible. Too orange. Too dark. Grain like a sandstorm. That is mistake number one. Presets are a starting point, not a magic wand. No two photos have the exact same lighting, skin tones, or jacket color. You have to adjust exposure, contrast, and white balance after applying. I learned this the hard way when I tried a preset called “Vintage 90s” on a photo of my Adidas Gazelles. It turned the white stripes into a sickly yellow. Gross.
The fix is simple. Apply the preset, then go to the Lightroom editing sliders. Lower the grain if it’s too much. Pull back the warmth a touch. Adjust the shadows so your face isn’t lost in darkness. Treat the preset like a base foundation. You still need to contour the rest. Honestly, taking thirty seconds to tweak can turn a disaster into a fire fall outfit post.
Don’t Let Your Fall Outfits Get Washed Out: Fix This One Setting
Fall outfit ideas rely on rich colors. Browns, rusts, olive greens, mustard yellows. Film presets often desaturate everything to mimic old film stock. That can kill the vibe if you are wearing a burgundy sweater that turns into a drab brick. Mistake number two: not protecting the warm tones. I remember editing a photo of my corduroy coat in a pile of leaves. The preset drained all the life from the coat. Looked like a thrift store reject from 1993. Not the good kind.
What to do. Go to the HSL panel in Lightroom Mobile. Boost the saturation and luminance of the orange and red channels. That brings back the warmth in your fall outfit without ruining the film look. Also check the green channel if you are outdoors with trees. Fall foliage should not look like swamp water. A tiny tweak here and your budget film preset suddenly works with your sweater, your jeans, your whole vibe.
Y2K Aesthetic Selfies: The Brutal Truth About Overdoing the Grain
Y2K aesthetic is all about that gritty, low-quality camera feel. Grain is part of the look. But here’s a mistake I see everywhere on Instagram. People crank the grain slider to 80 and call it a day. Your selfie ends up looking like it was taken through a sandstorm. Not nostalgic. Just annoying. I did this with a photo of my bestie and me at a beach city boardwalk. The preset added grain, I added more grain, and her face turned into a pointillist painting. She looked like a Seurat, but not in a good way.
Stick to a grain amount between 20 and 40 for Lightroom Mobile. Less if your photo already has noise from bad lighting. Remember that film grain is subtle. Real 35mm film from the early 2000s had texture, but you could still see the person’s eyes. If you want that extra Y2K punch, use the vignette tool to darken the edges. That simulates the cheap lens falloff. That is more effective than drowning your shot in grain. My opinion anyway. Try it.
How to Adapt the Same Preset for Beach City Shots and Bestie Pics
You love that one budget film preset. You use it on everything. That is mistake number three. Different scenes need different treatments. A beach city shot with bright sand and blue water has a completely different color temperature than a bestie pic taken under a string of fairy lights at night. I made this error when I used the same “Moody Film” preset on a sunny Malibu pier photo and a dimly lit rooftop selfie. The beach photo turned cyan and cold. The rooftop selfie looked like it was shot in a cave. Not versatile. Not cute.
Here is the workaround. Make two custom variations of the same preset. One for bright outdoor scenes and one for indoor or low light. In Lightroom Mobile, after you tweak the preset to suit a beach photo, save it as a new preset (hit the three dots, create preset, name it “Beach Film”). Then adjust the original preset again for a darker scene and save it as “Night Film”. Now you have two quick options. It takes two minutes. You will never fight with white balance again. I also recommend adjusting the tint slider for bestie pics so skin tones don’t go green under artificial light. That is the real secret.
A Checklist: What to Adjust After Applying Budget Film Presets
I made a little list for my own sanity. You can steal it. These are the five things I check within ten seconds of applying any preset on Lightroom Mobile. Saves me from regret later.
- Exposure: If the photo looks too dark or too bright, tap the exposure slider and move it until the highlights don’t clip.
- White balance: Use the eyedropper on a neutral area (white wall, gray concrete) or just eyeball it. Skin should not look like a zombie or a tomato.
- Grain: Already mentioned. Keep it under 40. Sometimes I drop it to 15 if the original photo had noise.
- Contrast: Film presets often add contrast. That can blow out details in a white t-shirt or a light background. Pull contrast back by 10 or 20 points.
- Vignette: I usually reduce the default vignette because Lightroom presets love to darken corners too much. Leave a subtle edge dark but not a black hole.
That checklist takes maybe twelve seconds. I time it. Do this and your fall outfit ideas will actually look like the Pinterest board you saved.
One Weird Mistake: Forgetting Your Camera Phone Settings
This is the mistake that used to drive me insane. People buy budget film presets and then blame the preset for being bad. But the problem is the photo itself. Your Lightroom Mobile preset cannot fix a photo that was shot with the wrong camera settings. Look, if you took a selfie with HDR turned on and the phone’s auto exposure overcompensated for your face against a bright sky, no preset will save it. The highlights are already blown. The shadows are already crushed. You are applying lipstick on a pig. I know because I did this with my pixel phone on a cloudy day. The preset made the sky look radioactive green.
Fix this before you even open Lightroom. When you shoot for a Y2K aesthetic, turn off HDR. Set exposure manually a little dark (underexpose by a stop). That gives you more room in editing to pull up shadows without noise. Also, use the 1x zoom lens, not the ultrawide, because ultrawide lenses add distortion and weird color casts. Trust me. My bestie’s face looked like a funhouse mirror the first time I tried an ultrawide Y2K shot. Never again. So check your phone settings first. Then apply your preset. You will thank me later.
Final Thoughts on Making Budget Film Presets Work for You
I have burned through maybe fifteen packs of cheap film presets over the last few months. Some were total trash. Some were gems hidden under bad preview images. The key (sorry, I know that word is cliche but it really is the key) is to approach them as tools, not solutions. You have to know your fall outfits, your lighting, your own skin tone. A preset that works for a pale person in cloudy London might not work for you in sunny California. That is fine. Just adjust. And honestly, do not spend more than five bucks on a pack. The expensive ones are often just repackaged freebies anyway. Save your money for actual film cameras if you want to go that route.
Anyway, that is my two cents. If you try any of these budget film presets for your Lightroom Mobile fall outfit photos or Y2K selfies, drop me a message or tag me in your post. I want to see what you come up with. Especially if you are shooting Adidas fits on a beach pier. That is my sweet spot. Happy editing.
#filmpresets #lightroommobile #budgetfilm #falloutfits #y2kaesthetic
Leave a Comment