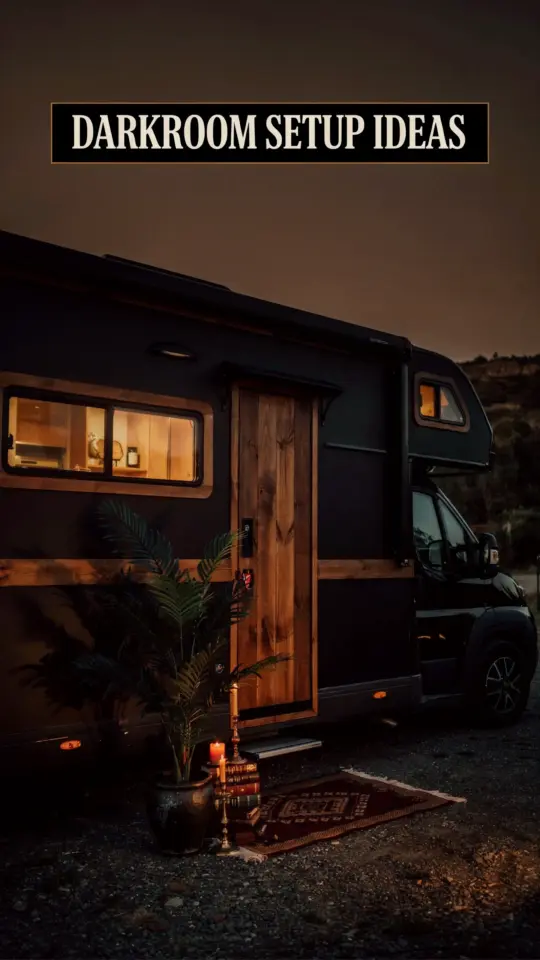
Most camper makeovers start with a can of white paint and a dream. Not this one. The dark and moody RV renovation I’m breaking down here trades sterile brightness for a cabin like atmosphere, and the preserved moss wall in this motorhome is the piece that seals the deal. Look, I’ve scrolled through hundreds of RV renovations, but this one sticks because it solves real problems instead of just applying a color palette. If you’re trying to get this same effect in your own rig, you’ll want to avoid the mistakes I keep seeing people make.
Mistake One: Treating a Small Space Like a Big Room
People see a dark wall in a magazine spread and think they can just copy it into a 7-foot-wide corridor. That only works if you plan for how the dark color moves around corners and reflects what little natural light you have. The owner of this motorhome understood that before anything else: she used the dark tones as a base, but she broke up the visual weight with the moss wall, warm brass fixtures, and a lighter ceiling.
Here’s the common error. You paint every surface the same charcoal and suddenly the space feels like a cave instead of a cozy nook. You need variance. You need texture. You need something that catches your eye at the exact distance where a hallway meets a living area.
- Pick one feature wall for the darkest color, not all four walls.
- Use mirrors or lighter panels opposite windows.
- Let the moss wall be the texture point, not the only point.
That last tip honestly comes from experience. I once helped a friend paint her entire tiny bathroom black, and she regretted it within a week. It wasn’t the color itself, it was the lack of contrast. Dark works when it has something to bounce against.
Choosing the Wrong Moss Wall for a Moving Vehicle
Not all preserved moss is created equal. Some panels are heavy, some shed fibers, and others are basically glued onto cardboard backs that can’t handle the flex of a motorhome. The gorgeous wall in this renovation uses a lightweight preserved moss, but I’ve seen people order giant sheets from craft stores that actually sagged on the Luan walls within a month.
You want to look for a product that’s specifically designed for vertical installation and has a backing that can take a little vibration. Ask the seller two questions: how much does it weigh per square foot, and can it handle temperatures above 90 degrees? Because an RV oven gets hot, and no one wants a moss shower in their kitchen.
Here’s a weirdly specific lesson I learned from a contractor: preserved moss needs air flow. If you glue it directly onto a plastic wall panel, you might trap humidity behind it. Then you get mildew, and that’s the opposite of moody. It’s just gross. Use a thin furring strip or a mesh adhesive layer to leave a tiny gap.
Forgetting That Dark Needs Depth
A flat, one-note dark interior is exactly what makes a motorhome feel like a coffin. The trick is layering. In this RV renovation, the black cabinetry is offset by white oak shelving, the moss wall has three shades of green within the same panel, and even the ceiling gets a soft sage treatment instead of stark white. That kind of complexity is what turns “dark” into “moody.”
So when you’re picking paint, don’t just grab a single can of charcoal. Get a sample of four or five colors in the same family. Swatch them on your actual wall and look at them at different times of day. The same brown-black that reads warm at noon can turn cold and dead by 7 PM under LED lighting.
And please, don’t forget the shadows. Dark rooms need shadows that feel intentional. That means you should place your lighting so it grazes the moss wall texture and creates little pockets of light and dark. Otherwise everything becomes a gray blur.
Skipping the Lighting Plan Until the End
This might be the most expensive mistake you can make. You install all your dark panels, you mount the moss wall, you pick out beautiful matte black sconces, and then you realize the wiring doesn’t reach the right spots. Or worse, you use the stock RV puck lights that throw a greenish glow on your warm paint. I’ve seen that exact thing kill more moody interiors than any other design choice.
The smart move is to map out your lighting before you cut a single hole. Think in zones: one dim light for reading, one warm light to wash the moss wall, and one task light for cooking. Buy LED tape lights and test them on a small area of your wall to see the color temperature. Honestly, 2700K to 3000K works best for a cabin feel. Anything above 4000K starts to feel like a hospital.
Here’s a trick I wish I knew earlier: paint a piece of foam board the same color as your interior, then poke different light sources through it. You’ll see exactly how the shadows fall. It takes thirty minutes and saves you from buying three different sets of expensive fixtures that all look wrong.
Overlooking the Weight and Vibration Reality
An RV moves. That sounds obvious, but people act like their motorhome is a stationary loft when they’re designing walls. The moss wall in this build is attached to a thin aluminum frame with high-bond tape plus mechanical fasteners. That might be overkill for a tiny panel, but it’s the right thinking.
Here’s what actually happens. You drive down a highway at 70 miles per hour. You hit a pothole. The entire structure flexes about a quarter of an inch. If your moss wall is glued with craft adhesive to a particle board backing, it will eventually pop off or crack. Same goes for heavy dark ceramic tiles. They look perfect in a stationary trailer, but they’re a nightmare in a moving vehicle.
Weigh everything. Literally put your huge decorative mirror on a scale before you mount it. You’d be surprised how many beautiful design pieces weigh more than a full gallon of paint. If the combined weight of your dark decor plus the moss wall exceeds what your wall studs can hold, you need to compromise. Choose lighter wood, smaller panels, or acrylic instead of glass.
Using the Same Paint Finish for Every Surface
Flat paint on walls, satin on cabinets, high-gloss on trim. That’s the formula that makes a dark interior look intentional. But most DIYers buy one can of eggshell and roll it everywhere because it’s easy. You lose so much depth when every surface has the same sheen.
In this motorhome renovation, the moss wall sits right next to a high-gloss black ledge and matte green cabinetry. The light hits each one differently, which makes the space feel bigger and more layered. If you want to replicate that, use separate paints for separate areas. A low-sheen paint on walls hides imperfections, but a semi-gloss on doors and drawer fronts gives you that crisp cabin silhouette.
One thing to watch out for: high-gloss paint shows every fingerprint and speck of dust. Okay, that’s fine for a little trim, but if you gloss the entire kitchen wall and you actually cook, you’ll be wiping it down constantly. Ask me how I know. My tiny house still has greasy marks above the stove from a gloss mistake. Choose your shiny spots wisely.
Ignoring the Ceiling and Floor
Dark walls with a bright white ceiling break the spell. It looks like a mistake instead of a mood. The best moody RVs carry the color story upward, but they do it quietly. A deep green or soft charcoal on the ceiling can completely change the feeling of the space, especially in a bedroom nook.
But here’s the catch: dark ceilings absorb light. So you need to account for that in your lighting plan. The moss wall might get a spotlight, but the ceiling above it should have a few tiny LED spots or a dim strip. Otherwise you’ll have a dark hole over your head, and not the cozy kind.
For the floor, don’t go black unless you love showing dust. Go with a deep walnut or a gray tone that has brown undertones. And use a vinyl plank that’s rated for slide-outs, not a hard wood or tile. Trust me, a dark floor is beautiful, but a floor that shifts and cracks is just sad.
Your Turn to Go Moody (Without the Regret)
The key is to start small. Pick one area of your RV, maybe the dinette or the bed, and commit to the dark and moody treatment there. Use the moss wall as your inspiration, but don’t forget the practical layers: moisture barriers, flexible adhesives, and a lighting diagram. That’s what separates a successful motorhome renovation from a DIY horror story.
So grab a sample of that deep forest green, test it on a piece of plywood, and imagine the light hitting it just right. You’ve got this. And if you need a visual boost, go look at @_gray_co_’s full tour. That moss wall won’t be the only thing you screenshot.
Leave a Comment