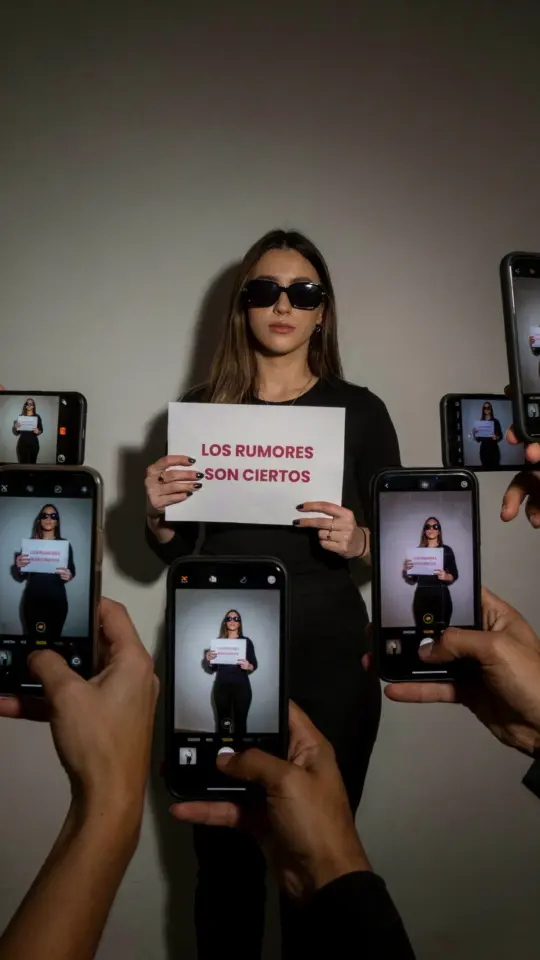
Fashion photography doesn’t need a big budget, it needs a few smart choices and a willingness to learn from dumb ones. I’ve spent the last three springs shooting lookbooks in a cramped studio corner, and honestly, my first attempts were a disaster. This article is a list of the common mistakes I made, plus the exact fixes that finally made my little setup work. Grab your coffee, and let’s talk about what actually happens when you point a camera at a model with a cheap backdrop behind her.
Mistake #1: Buying a Backdrop Before Understanding Your Light
The biggest trap in studio photography is thinking a pretty roll of paper will save you. It won’t. I snagged a gorgeous sage green backdrop on sale, unrolled it, and the whole thing looked like a washed-out hospital curtain. Why? Because the light in my room was bouncing off a white wall at an angle that flattened everything.
Here’s the thing: a backdrop is just a surface. What you see in the final photo depends almost entirely on how light falls on that surface. Do a quick test before you commit to any design idea. Clip the backdrop up, stand a mannequin or a chair in front of it, and snap a few frames from different angles.
- Move your light source closer to the backdrop for a softer, more even wash.
- Move it farther away if you want a dramatic falloff in brightness.
- Turn off overhead fluorescents. They make sage green look like baby poop.
Seriously, that last one is non-negotiable. The color of your backdrop only reads as beautiful if the light is warm and directional.
Mistake #2: Picking Seasonal Colors Without Looking at the Garments
Spring lookbooks scream for pastel backgrounds, but pastel backgrounds don’t always scream for your clothes. I once shot a mint green top against a peach backdrop, and the result was so washed out that you couldn’t tell where the shirt ended and the paper began. The client wasn’t thrilled.
Instead of guessing, lay the actual outfits on the backdrop before you hang anything. Hold each garment up and squint. Ask yourself: does this add contrast or does it create mud? For spring, I love soft lavender with cream tones, or a pale yellow with navy pieces. But that only works if the clothes are already in that family.
My go-to quick setup now is a single roller shade from a hardware store, painted with a swatch of leftover wall paint. Costs me ten dollars. Took ten minutes. And it matches the specific fabric colors in each shoot.
Mistake #3: Treating Props Like a Pinterest Board
I get it, the tiny stool with the wicker basket and the dried flowers looks adorable on your phone. In real life, it just clutters the frame. For a spring lookbook, you want the model and the outfit to be the entire story. Props should be punctuation, not the whole sentence.
One trick that saved me: choose one single prop that echoes the garment’s texture or color. A chunky knit cardigan looks great with a rough wood cube. A silk slip dress looks better with absolutely nothing around it. Seriously, nothing. The background is enough.
And please, whatever you do, never use fake flowers that look like they came out of a wedding centerpiece from 2007. I learned that one the hard way. My model accidentally knocked over a giant plastic tulip, and we spent twenty minutes laughing while I tried to edit it out of her shoulder line.
Mistake #4: Forgetting the Floor and the Ceiling
You might think a spring lookbook only needs a nice wall behind the model. Then you take a full-length shot and boom, there’s your scuffed up floor, a stray cable, and a ceiling tile that’s turning yellow. The camera sees everything, not just the backdrop.
My solution? Anything cheap that lies flat. A piece of canvas drop cloth over the floor, or a big roll of seamless paper that you can also tape down at the base. For the ceiling, just angle your camera lower or crop to waist-up shots. Problem solved.
Honestly, this mistake is the reason so many “studio ideas” fail in practice. People spend all their energy on the vertical surface and forget the horizontal one.
Mistake #5: Shooting at Noon When You Have a Window
Natural light is free and gorgeous, but it’s only gorgeous at certain hours. If your studio has a window, the worst time to shoot is when the sun is directly overhead. You get harsh shadows on the backdrop and angry squinty eyes on the model. Not a good look for a spring floral dress.
Try shooting in the morning, between 8 and 10, when the light comes in at a lower angle. Or push your setup to the late afternoon. That softer, golden glow makes pastel colors look creamy instead of chalky. And if you absolutely have to shoot at noon, hang a sheer white curtain over the window. It’s like a giant softbox for thirteen bucks.
But, and this is the real tip, always check the forecast. Overcast days are secretly your best friend. You get that diffused, even light that makes backdrops look expensive.
Mistake #6: Not Testing the Setup Before the Model Arrives
How many times have I done this? I get everything arranged, the model walks in, we’re ready to go, and then I realize I forgot to tape the backdrop down at the bottom. Or the seam is visible. Or there’s a weird wrinkle that looks like a mountain range on screen. Now everybody’s waiting while I fumble.
The fix is boring but necessary: take one test shot using yourself or a coat rack. Just one frame. Check the backdrop, the floor, the light, and the color. Then adjust. This takes five minutes and saves you an hour of post-production.
My personal rule is a two-cup rule. I set up, take a test shot, drink one cup of coffee while reviewing it, fix whatever’s wrong, and drink the second cup while waiting for the model. Then we shoot. No wasted time, no awkward apologies.
So next time you’re planning a spring lookbook spill, start with these fixes. Your backdrop won’t look like a billboard, your props won’t fight the clothes, and you won’t have to apologize for your floor. What’s the one mistake you keep making in your studio? I would honestly love to know.
Leave a Comment